Quick answer
Pick the test that matches your wall.
If you cannot move through XX-1 to XX-9, test Stage Breakthrough setup and positioning. If XX-10 is the wall, switch into stage bossing and compare boss damage, Accuracy, artifacts, and companion timing. When the breakthrough is close, Chalice can be tested as a manual restart trick instead of a stable farming artifact.
Stage Breakthrough
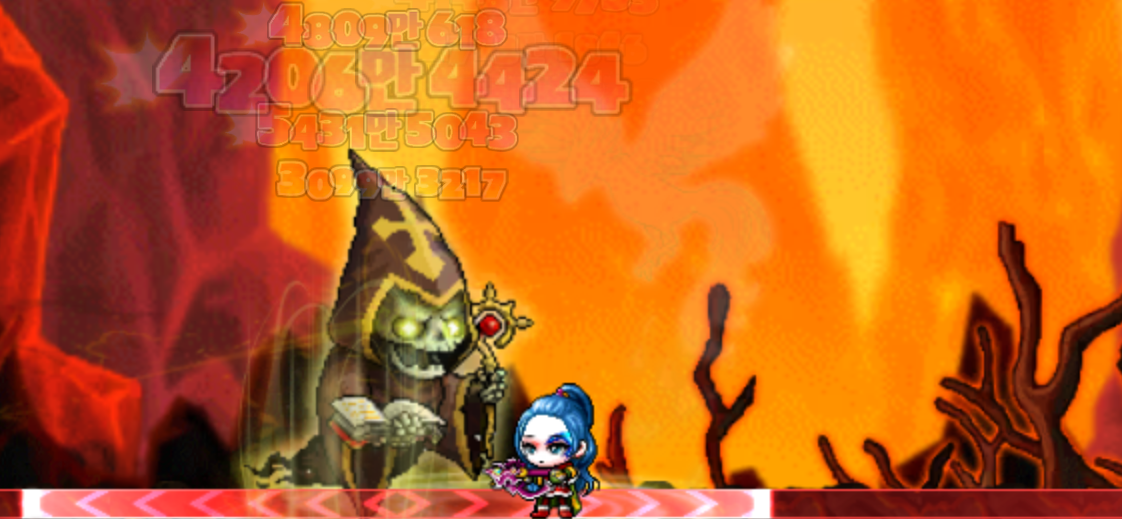
For XX-1 to XX-9, reach the final boss cleanly, then add enough boss damage to finish it.
Stage Breakthrough is a two-part check. First, you need enough Normal Monster Damage, attack speed, target count, and positioning to clear the regular waves without wasting too much timer. Then you need enough boss damage, companion timing, and artifact value to kill the final monster, which is considered a boss in-game.
Fix Normal Monster Damage, target count, attack speed, and positioning until the regular waves stop eating the timer.
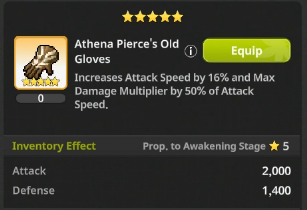
Add boss damage, companion timing, Chalice proc attempts, or Bottle plus Glove only after the final monster is reachable.
Consideration: The run is not a boss test until you can reach the final monster with usable time left.
How to check: Keep the setup the same, note whether you reach the final monster, then compare remaining timer or boss HP after leveling.
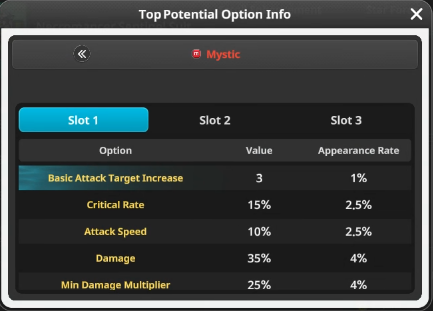 Basic Attack Target Increase on chest top potential can help
when waves are clumped and basic attacks are not hitting enough
enemies quickly.
Basic Attack Target Increase on chest top potential can help
when waves are clumped and basic attacks are not hitting enough
enemies quickly.
Consideration: This is a Stage Breakthrough quality check, not a universal bossing line.
Consideration: If the Night Lord swap makes waves fail, go back to more Normal Monster Damage.
Consideration: Test this when you can reach the final boss but need more finish damage or timer efficiency.
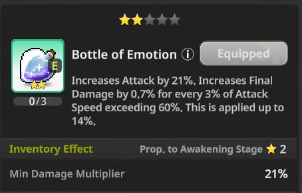
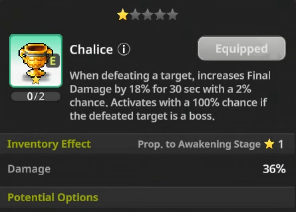 If Chalice is equipped, restart attempts until its Final Damage
proc appears from an early kill, then summon companions inside
that buff window. This is strongest for a near-clear, not for a
stage where the normal waves already fail.
If Chalice is equipped, restart attempts until its Final Damage
proc appears from an early kill, then summon companions inside
that buff window. This is strongest for a near-clear, not for a
stage where the normal waves already fail.
Consideration: This is restart-fishing for a push, not a stable idle setup.
Stage bossing
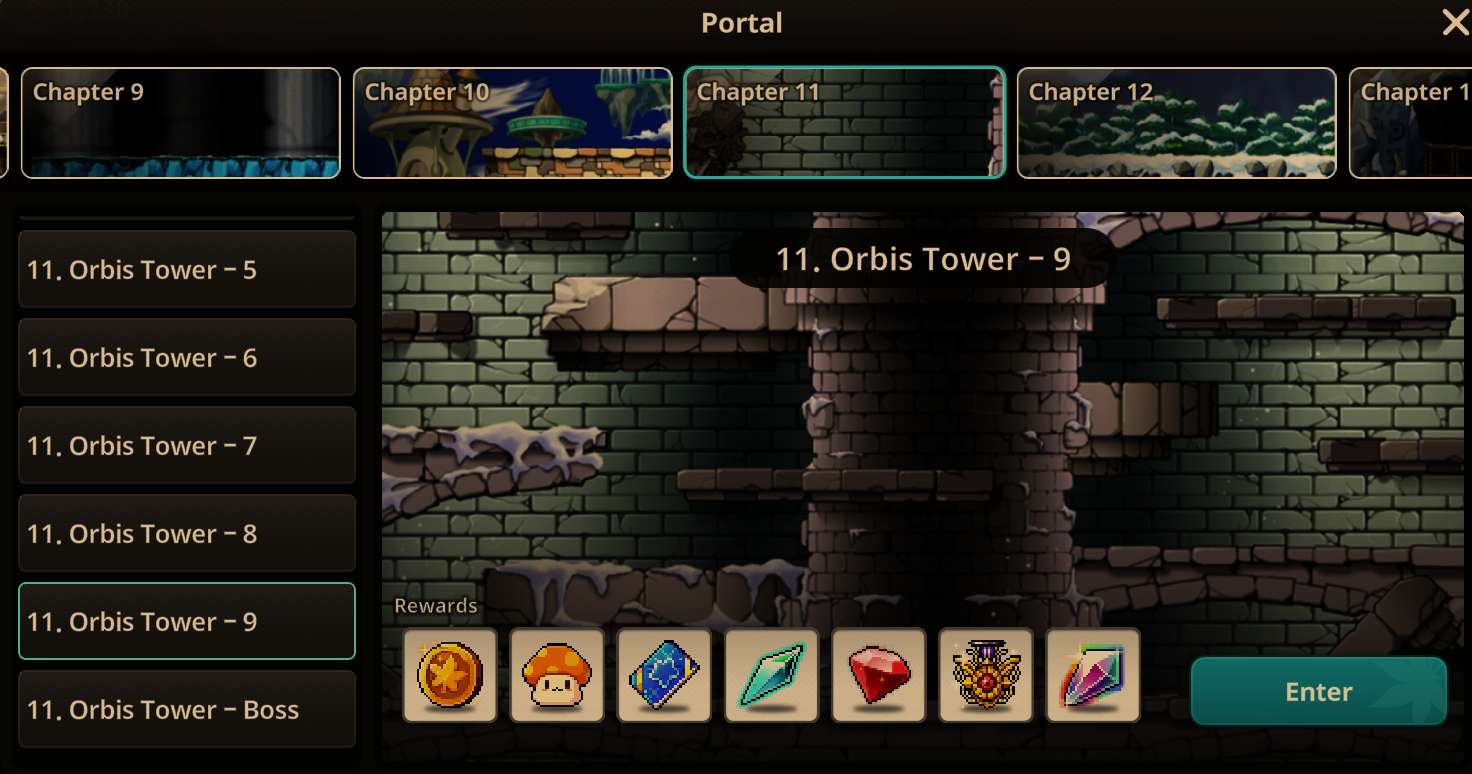
For XX-10, compare the full setup, not just the CP line.
The stage boss chart is useful as a rough route map, but comments repeatedly show that class, boss damage, artifacts, companion rarity, companion level, and manual timing can move the clear point a lot. Shadower and Fire/Poison can clear some later bosses at lower CP, while Fire/Poison and Ice/Lightning may feel worse earlier before the kit comes online.
CP can lie
Max HP, extra Accuracy beyond what you need, and weak legendary companions can inflate CP without solving a bossing wall.
Boss-specific stats
Boss Damage, Crit setup, Skill Damage, final-style buckets, Book of Ancient when Crit Rate is not capped, and the right companion can matter more than a generic CP increase.
Companion timing
If you use Hexagon Necklace, delay the summon so companions benefit from the stacked window. Several comments point to a last-30-seconds timing test.
BM versus F/P (pre-Bishop/Paladin)
Comments show Bowmaster fixing some XX-10 walls, while F/P can still win on some early-mid accounts. This note comes from the pre-Bishop/Paladin source set, so treat newer companions as separate tests.
Near-clear micro
If the boss is left at 1% to 5%, try manual play or small tweaks before calling the wall permanent. HP potion timing, safe tanking, companion swaps, and artifact timing can all swing a near-clear.
Accuracy checks
If you are missing, damage upgrades are being wasted.
The Accuracy thread gives a chapter-by-chapter reference pattern, but newer comments report misses even near the listed values. Treat the numbers as a first check, then verify in the current in-game display and your own run. If hits are missing, solve Accuracy before judging damage stats.

Chapter bosses in the source notes are described as having relatively low Defense, so Defense Penetration is usually not the first boss fix unless another source or in-game display points to it. For deeper stat logic, use the Accuracy and Defense Pen guide.
Positioning
Bad targeting can make a clearable wave feel inconsistent.
Basic attacks can choose targets inside range instead of always focusing the front enemy. That means one or two enemies may slip through while damage lands behind them. For Stage Breakthrough attempts, start with your main character controlled, step forward, and test maximum range so attacks hit the leading pack cleanly.
Checklist
Before you spend resources to force a push, test these in order.
- Confirm the content. Stage Breakthrough uses Normal Monster Damage to reach the final boss, then boss damage to finish. Stage bossing uses XX-10 boss damage and hit consistency.
- Check misses. If hits are missing, fix Accuracy before judging damage rolls.
- Swap to the right preset. Use content-specific equipment, companion, artifact, and skill presets.
- Remove bad CP. HP-heavy and defensive rolls can look good in CP while doing little for the current wall.
- Retest manually. Try positioning, companion deployment timing, Chalice proc timing if you are close enough to fish for it, Hexagon Necklace summon timing, and several attempts before calling a wall permanent.
Guide changelog
How this page has changed.
- Base: Rumii, Stage Progression & Leveling Tips, Mapleidle & Classic Guides, original post Dec 23, 2025.
- Base: Rumii, Stage Boss Push CP Guideline, Mapleidle & Classic Guides, updated Jan 9, 2026.
- Base: Rumii, Stage Bossing and Stage Breakthrough Companion Setup Guides, Mapleidle & Classic Guides, comments checked Apr 9, 2026.
- Base: Rumii, Stage Boss Push Accuracy Guideline, Mapleidle & Classic Guides, comments checked May 6, 2026.
- Base: Rumii, Stage Positioning Guide and Stage Breakthrough Artifact Tier, Mapleidle & Classic Guides.
- MapleStory Idle RPG Wiki artifact list, Chalice, Bottle, and Glove effects checked May 18, 2026.
- MGF reported-stage settings, checked May 17, 2026.
- DCInside stage-by-stage combat power reference post, updated Feb 26, 2026, checked May 17, 2026.
- DCInside content artifact setup note, checked May 18, 2026.
- DCInside artifact awakening note, checked May 18, 2026.
- Korean-language public artifact setup summary, Chalice retry note checked May 18, 2026.